Connecting Magento 2 - Seller
We recommend setting up a unique Magento store view to support Modern Dropship's requirements without affecting your customer-facing store.
Modern Dropship supports integrations with Magento version 2.4.4 and higher. Lower versions may not be able to integrate successfully.
Step One: Connect Platform
- Ensure that Magento 2 was selected when your company was created.
- Check this by looking for "Connect your Magento 2 Store" in your Modern Dropship account's Integration Settings.
- Provide the URL of your store during sign-up. The format is "https://subdomain.store.com".
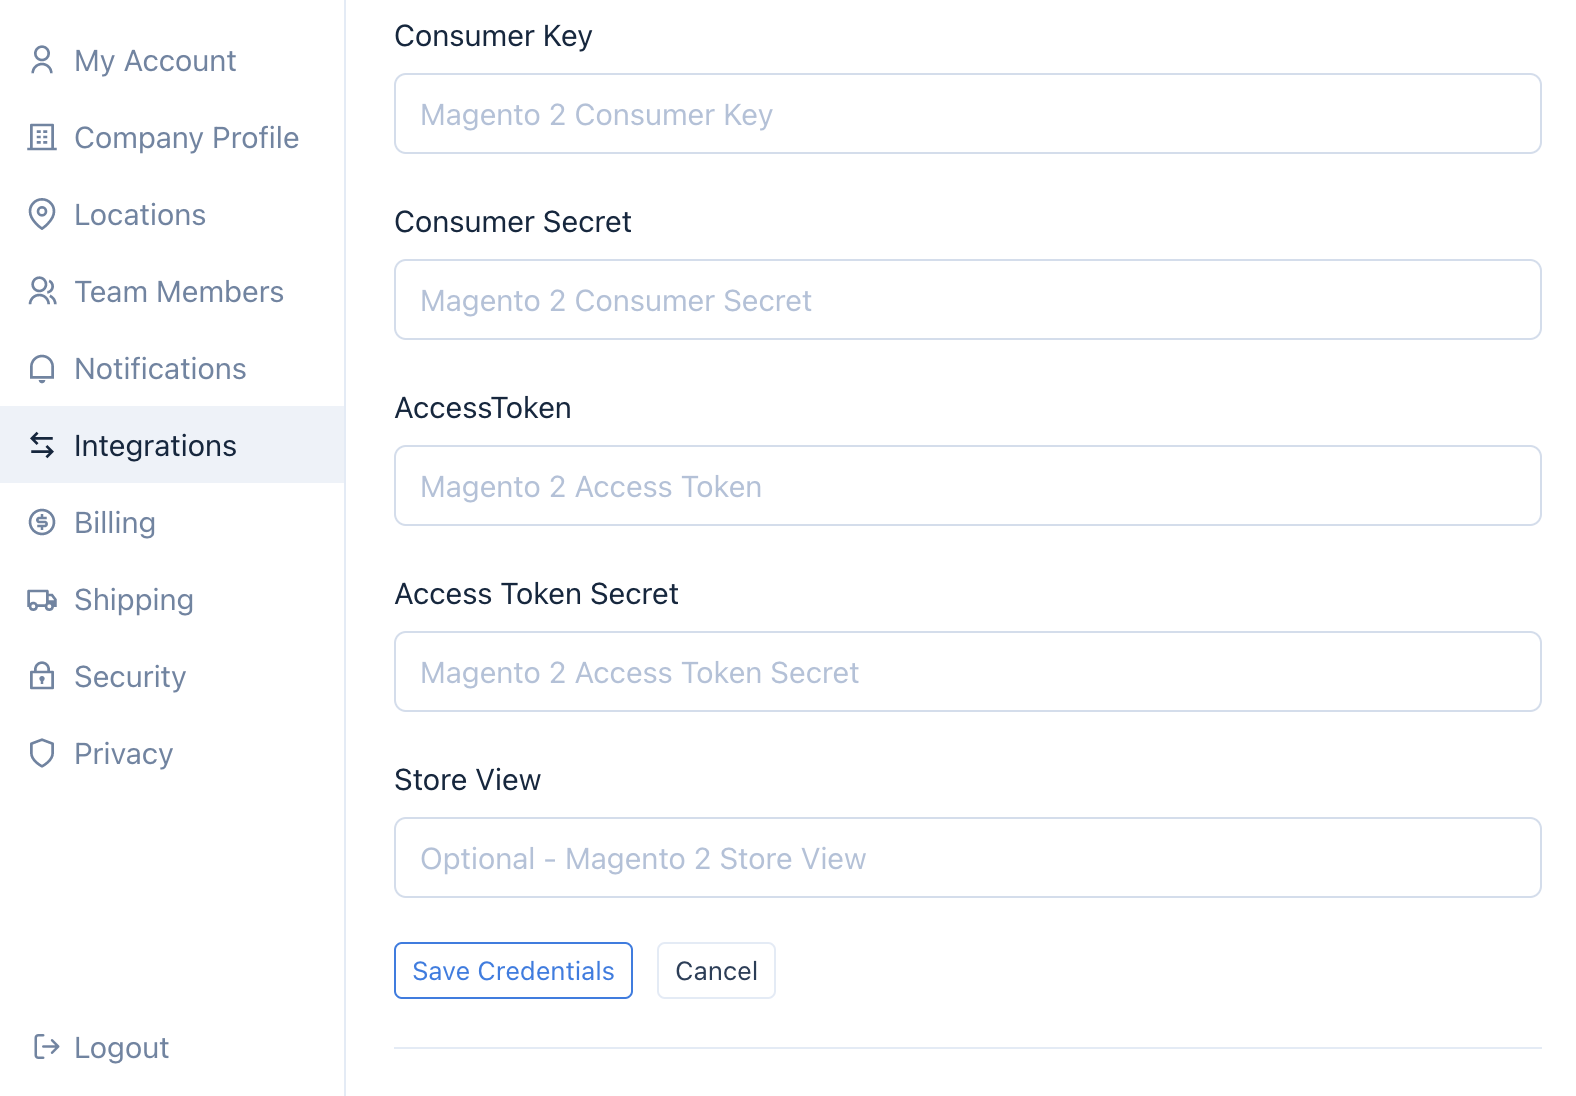
- If you do not see this section, contact support.
Step Two: Grant Permissions
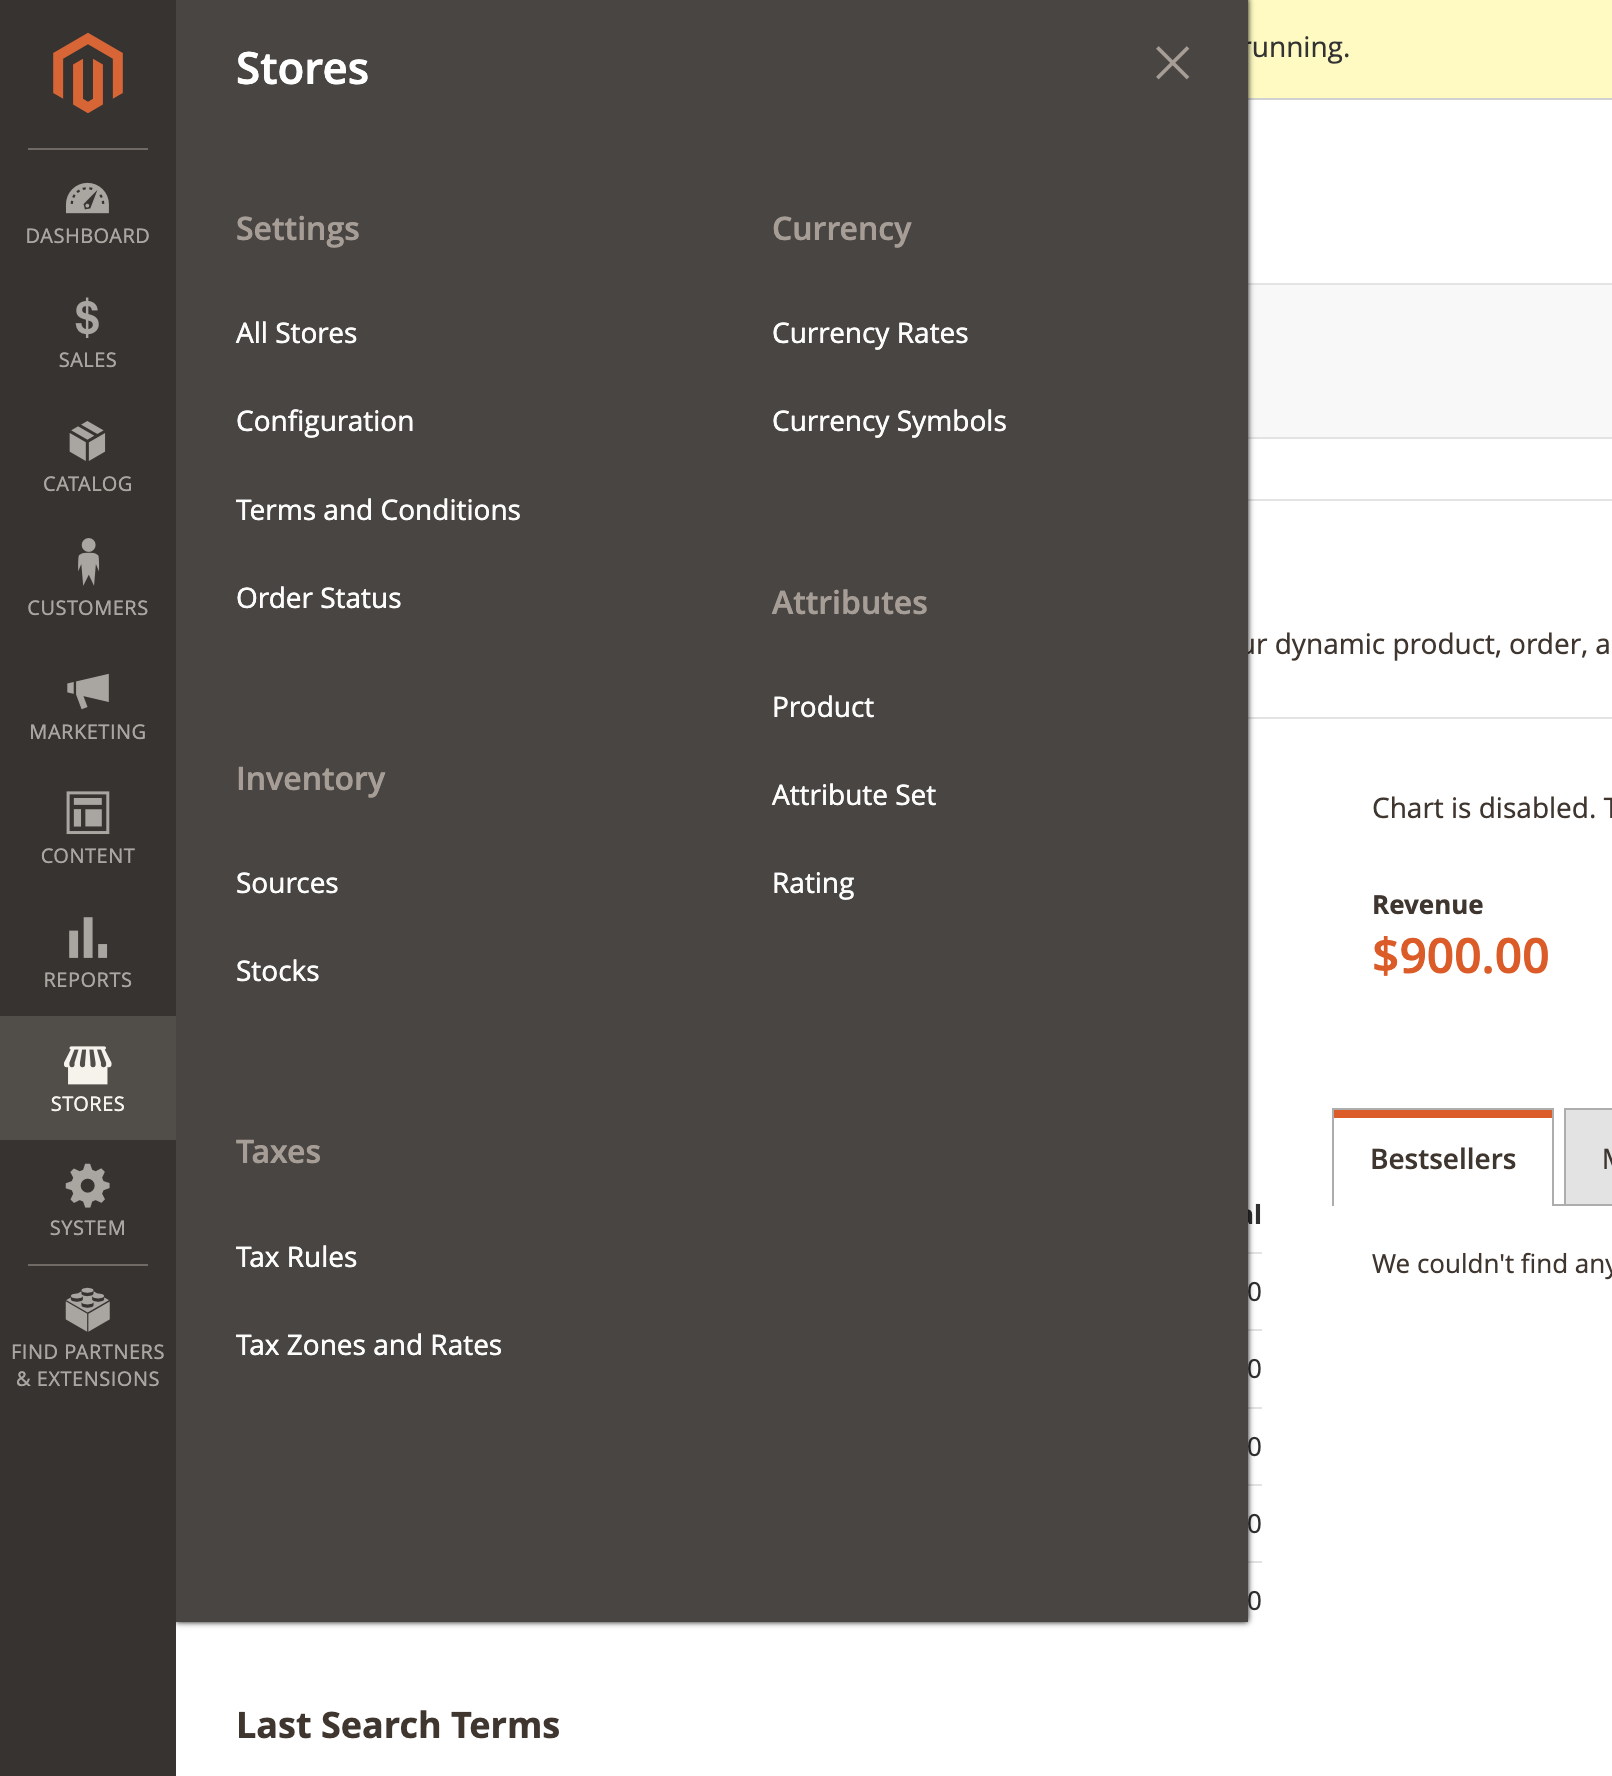
- Go to your Admin dashboard > Stores > Configuration > Settings.
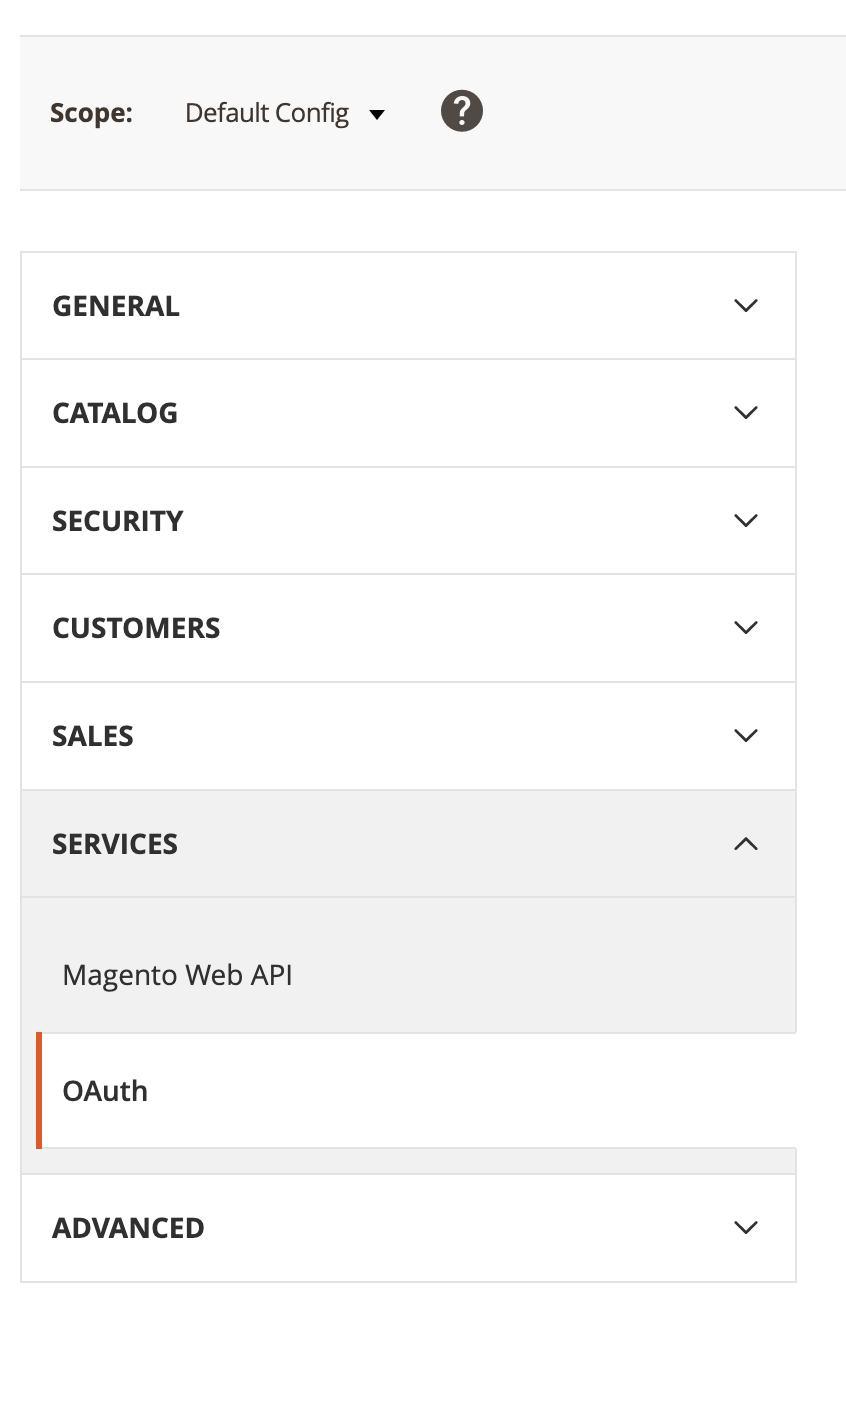
- Next, navigate to "Services" and "OAuth".
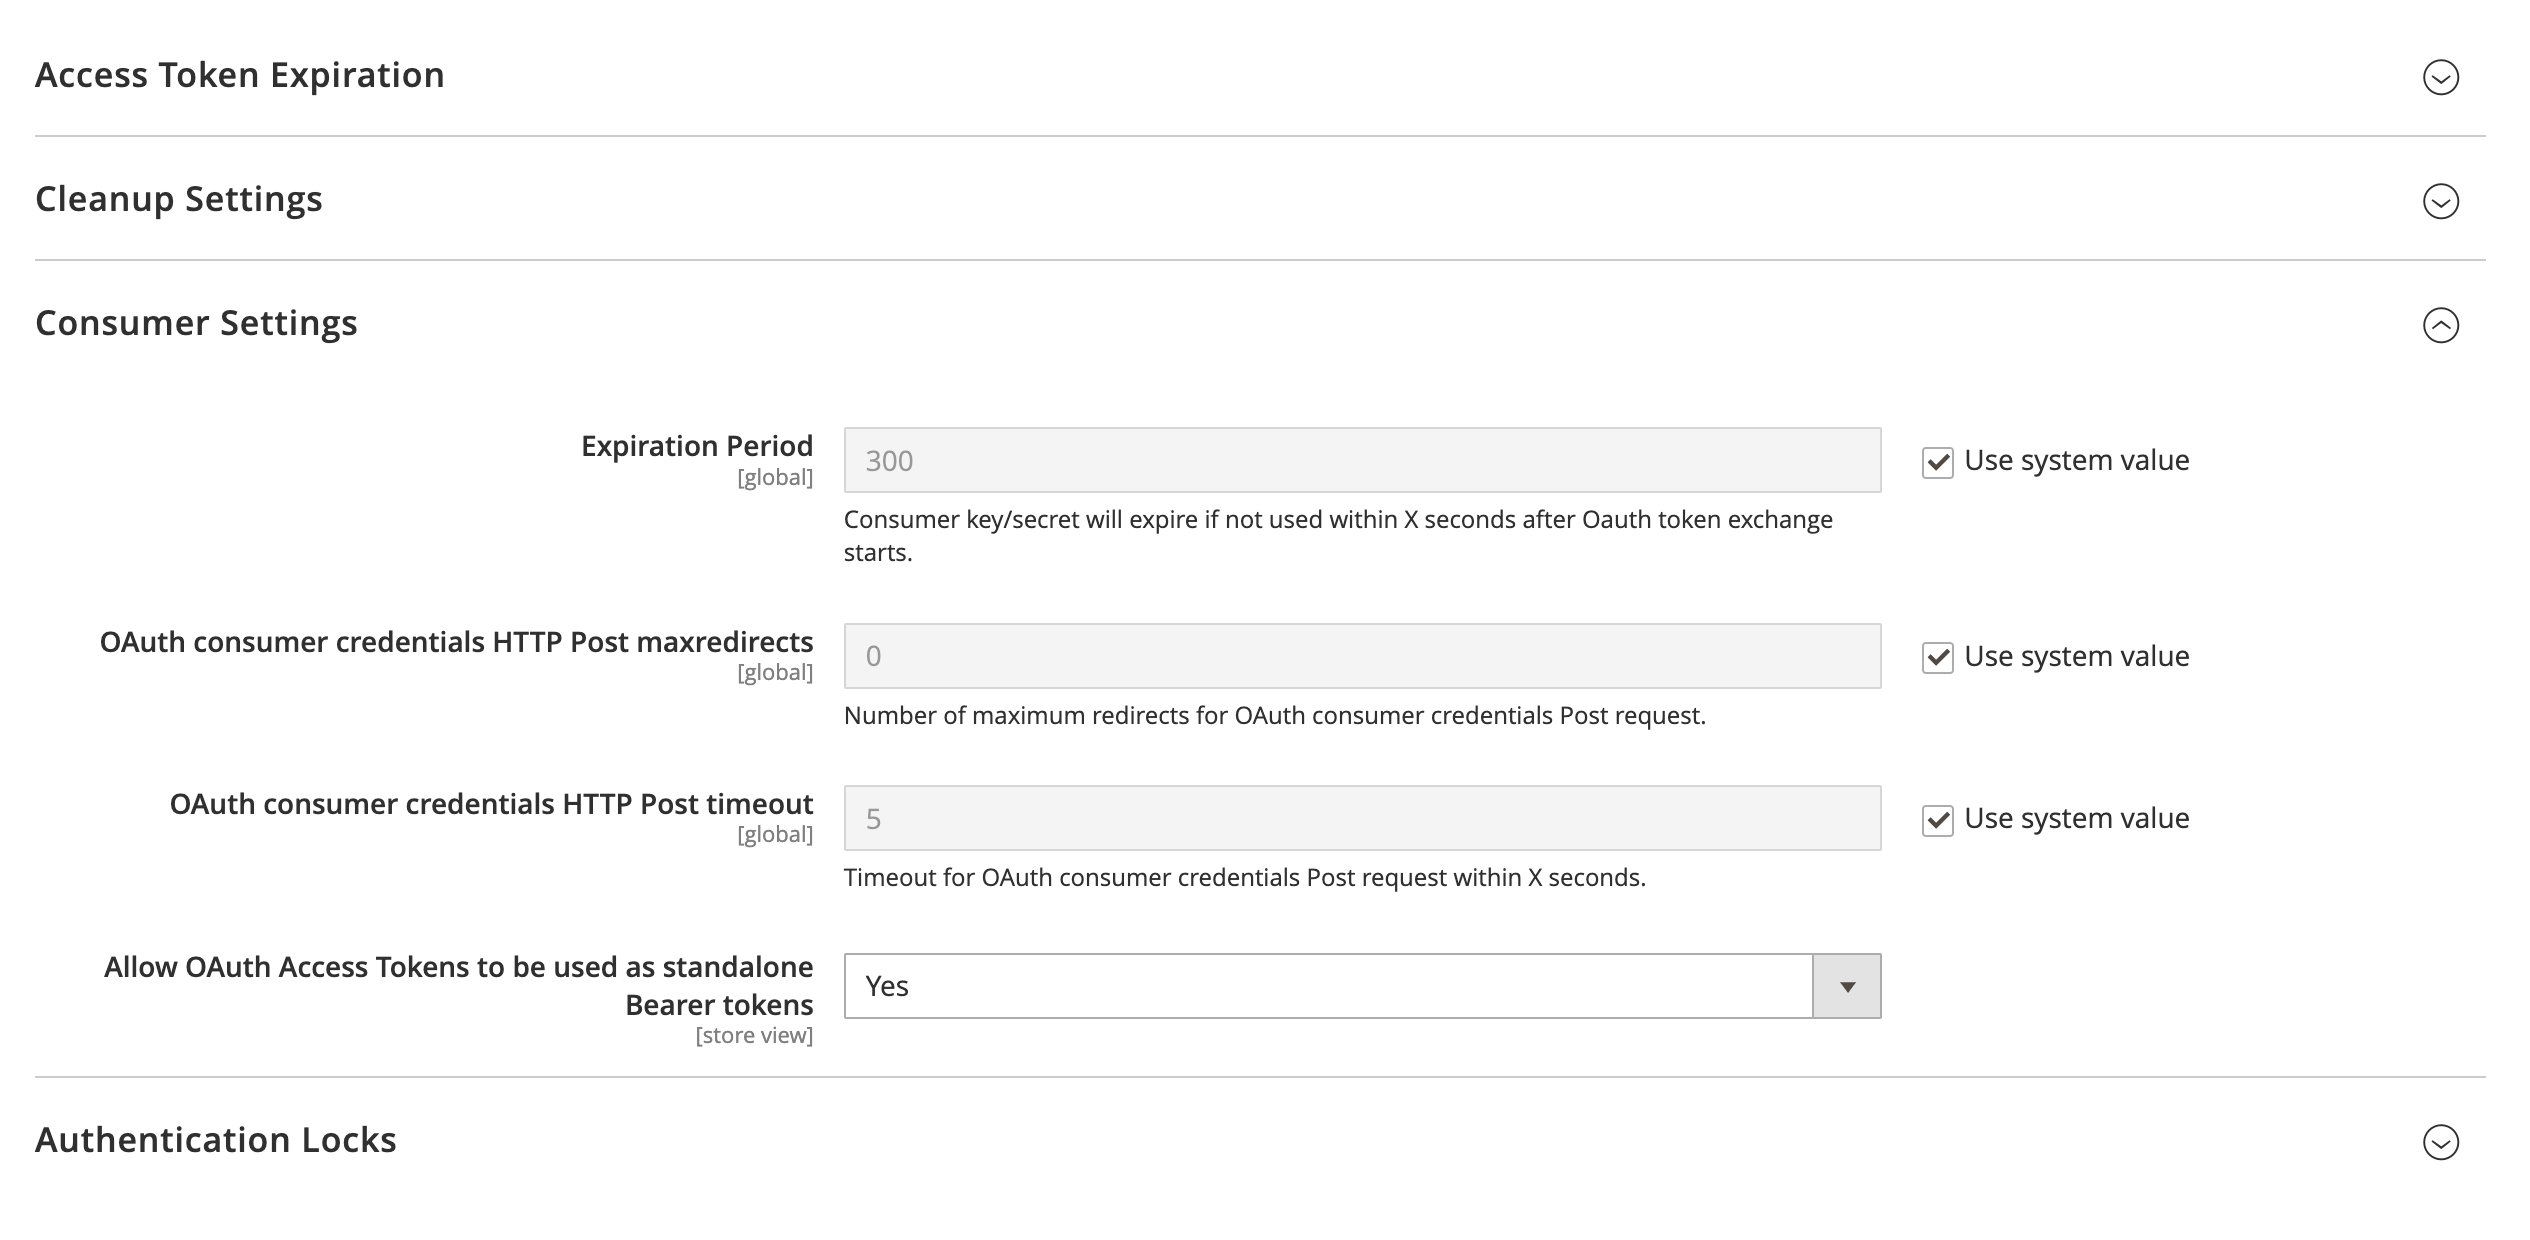
- Click the dropdown for "Allow OAuth Access Tokens to be used as standalone Bearer tokens" and select "Yes":
- Click "Save Config" at the top of the screen:

Step Three: Generate API Keys
- You will need to provide Modern Dropship with Magento2 API keys in order to connect your store.
- Go to your Admin dashboard > System > Extension > Integrations.

- Click "Add New Integration"

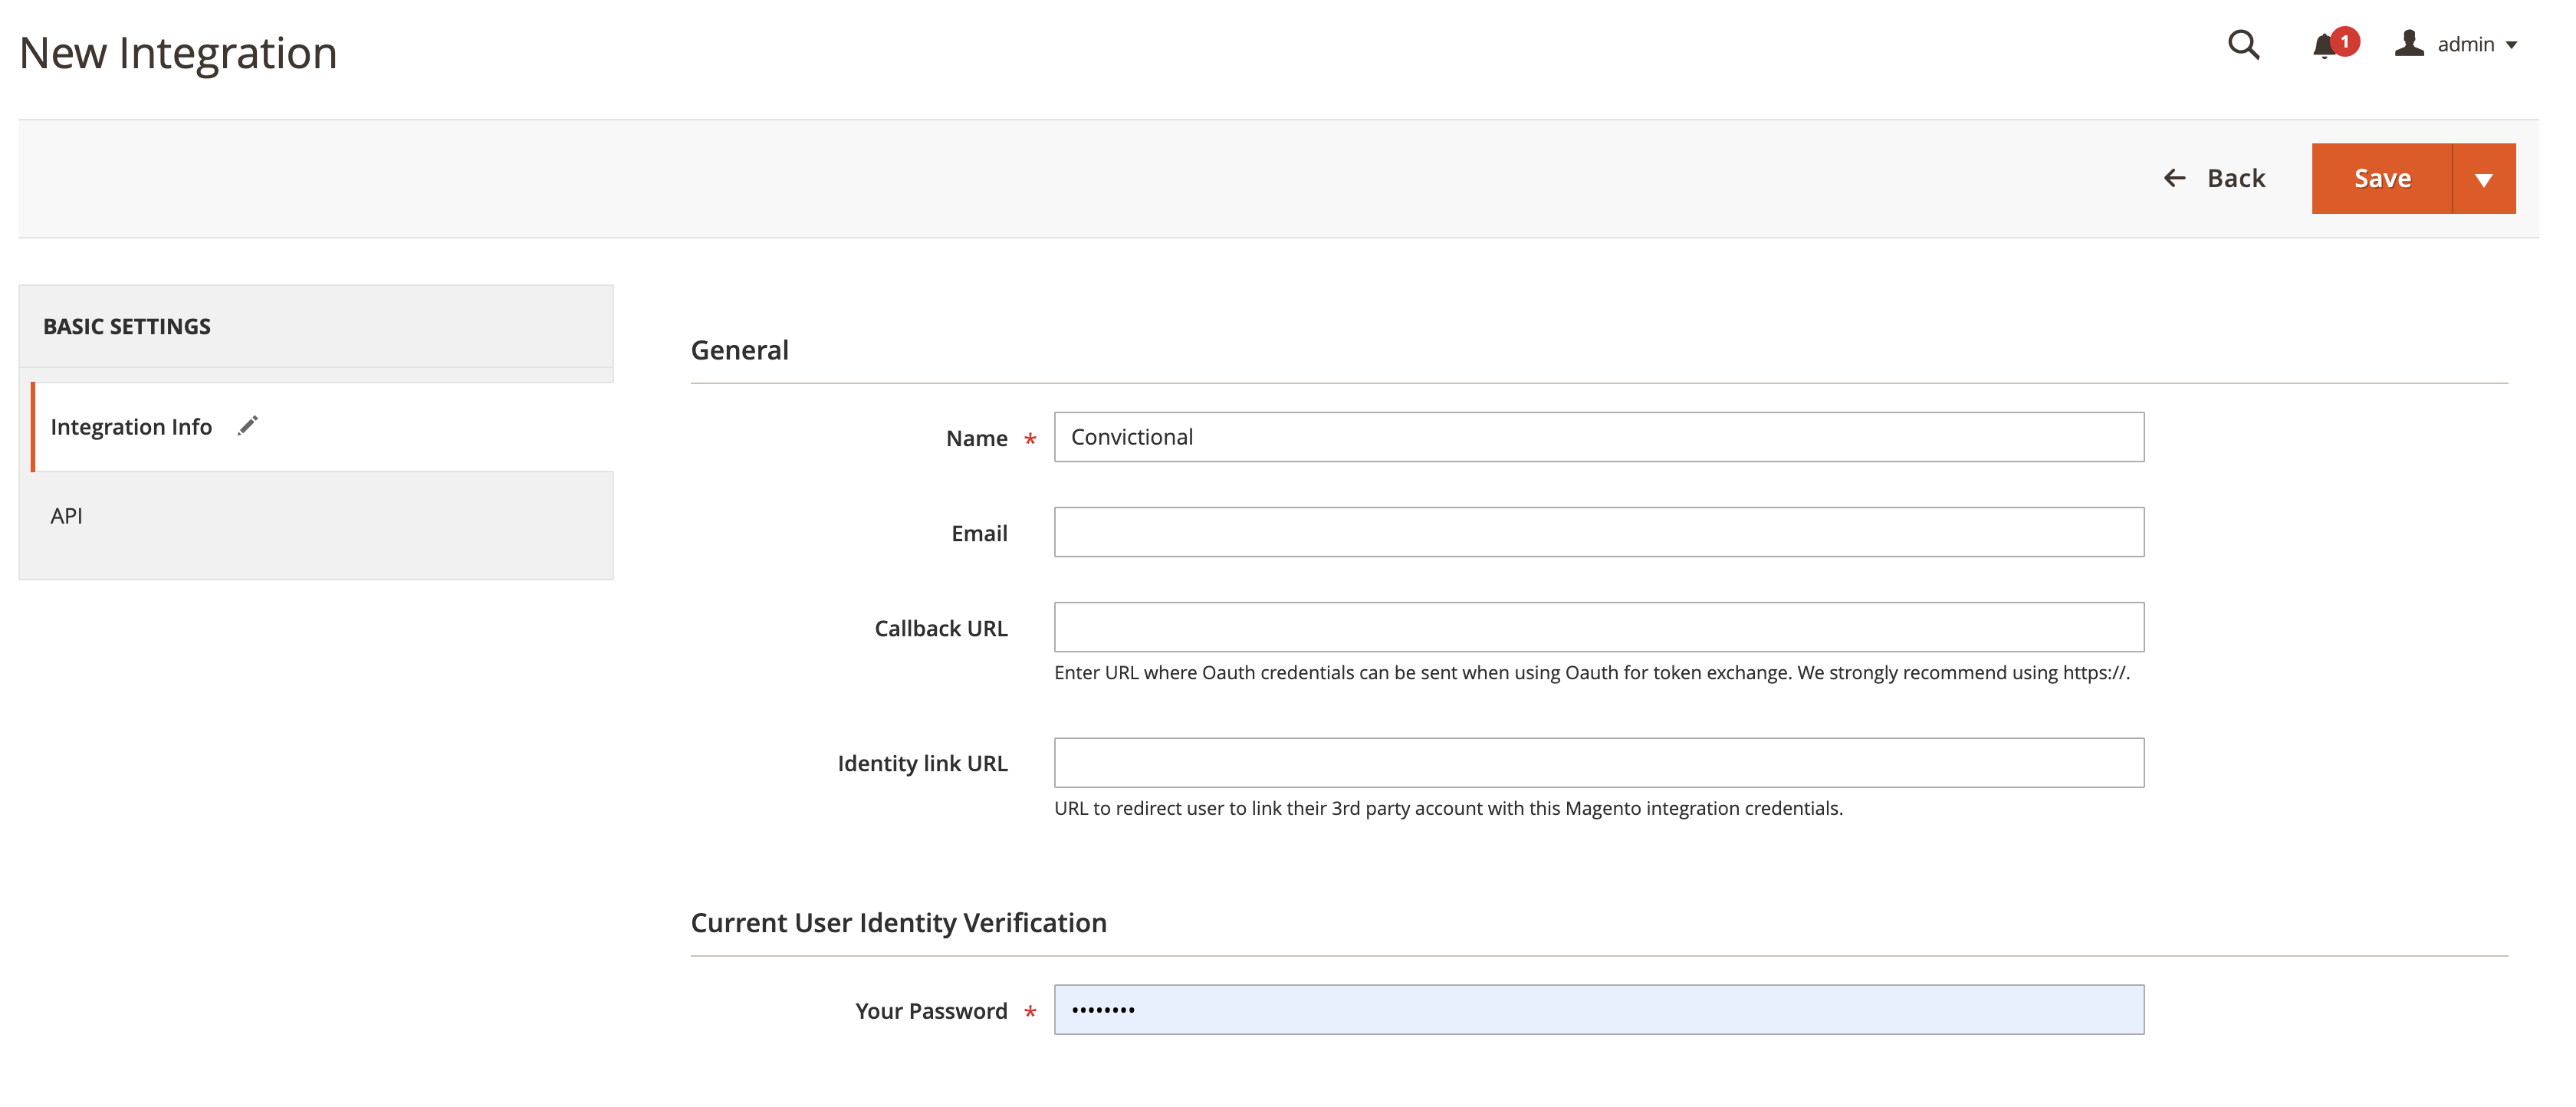
- Enter in "Modern Dropship" for the Name field, and your admin password:
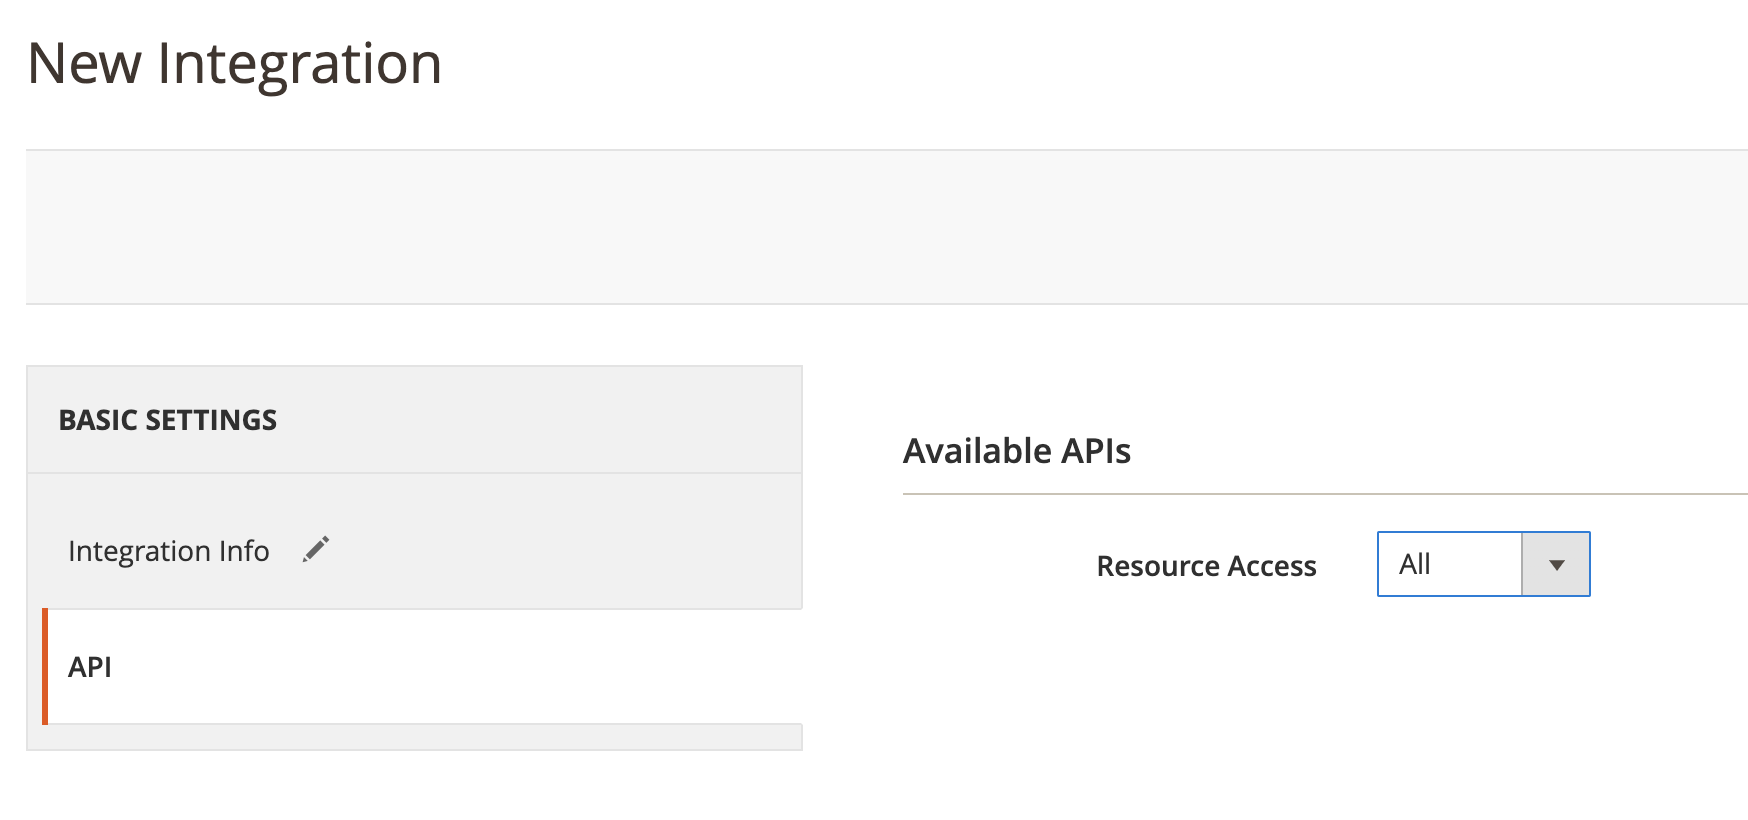
- Go to Basic Settings > API. On the "Resource Access" dropdown under "Available APIs", select "All":
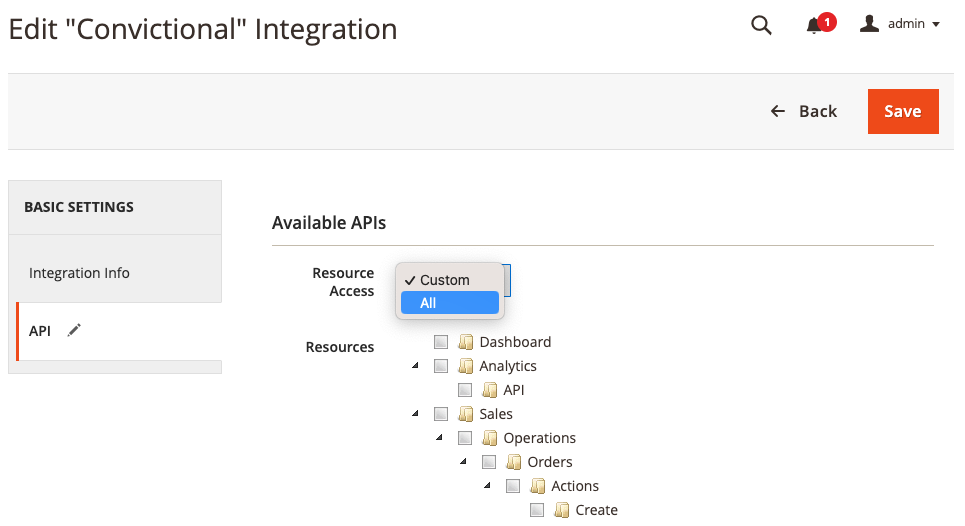
- Selecting "All" will check off the full list of resources:
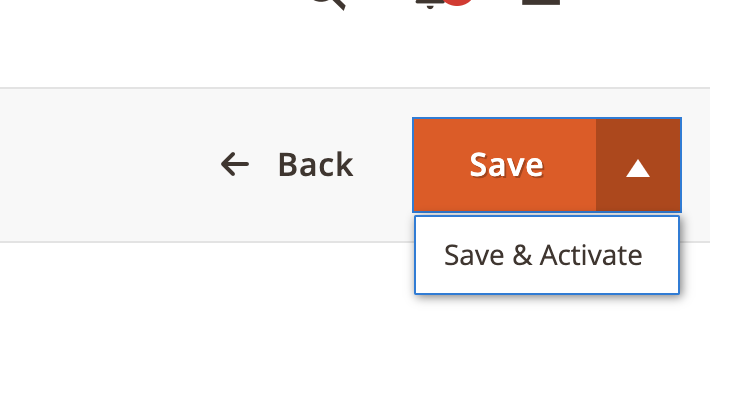
- Click on the arrow beside "Save" and click "Save and Activate":
- Click "Allow":
- This will generate the API keys. The API Keys look like this:

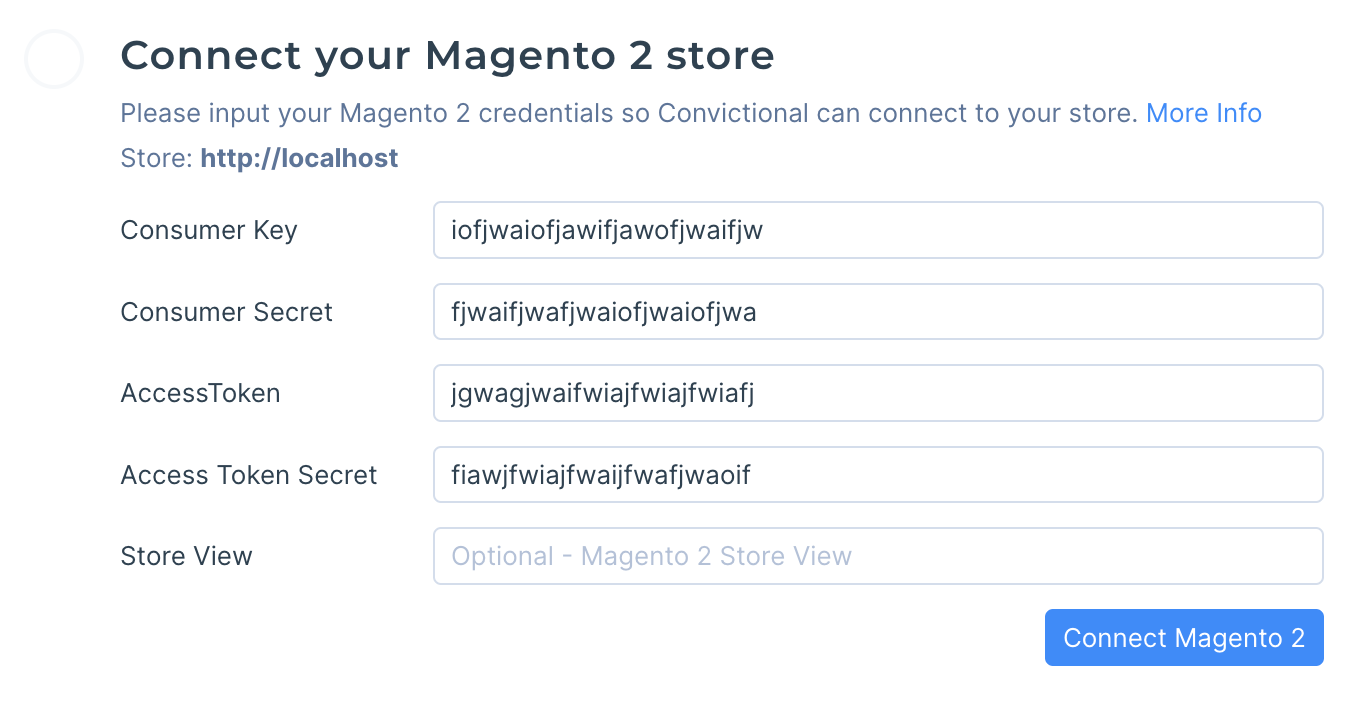
- Copy these keys into your Modern Dropship Settings panel. If you have the code for the store view that you obtained in the previous step, enter it in here as well. Click "Save Credentials":
- Modern Dropship will display that the credentials saved correctly:
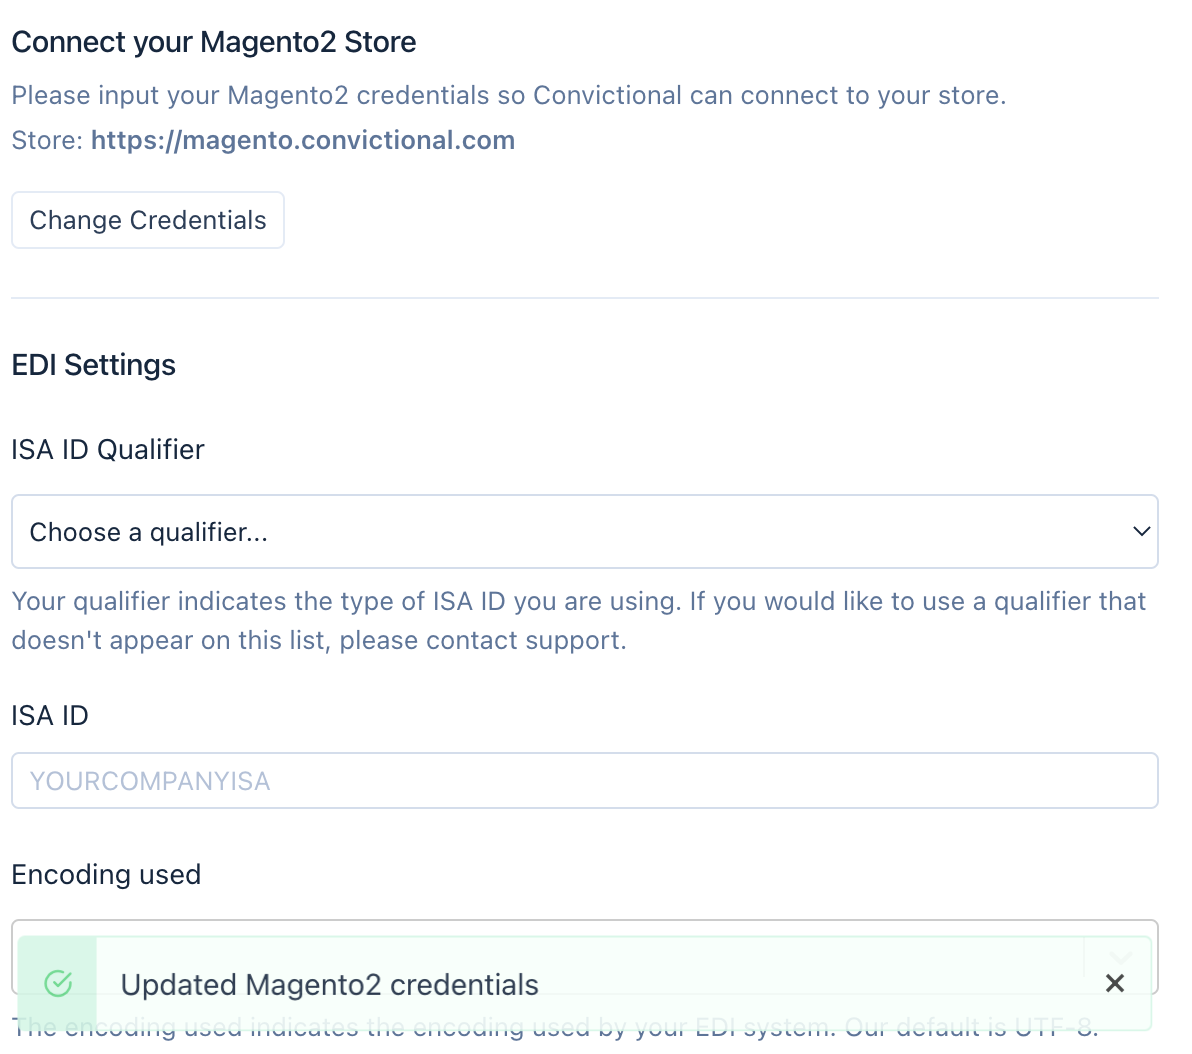
Within 30 minutes, your products will be visible within the Products tab.
Step Four: Enable Delivery Method
- You must enable a shipping method for Modern Dropship to be able to place orders on your Magento store.
- Go to Admin > Stores > Settings > Configuration > Sales > Delivery Methods:
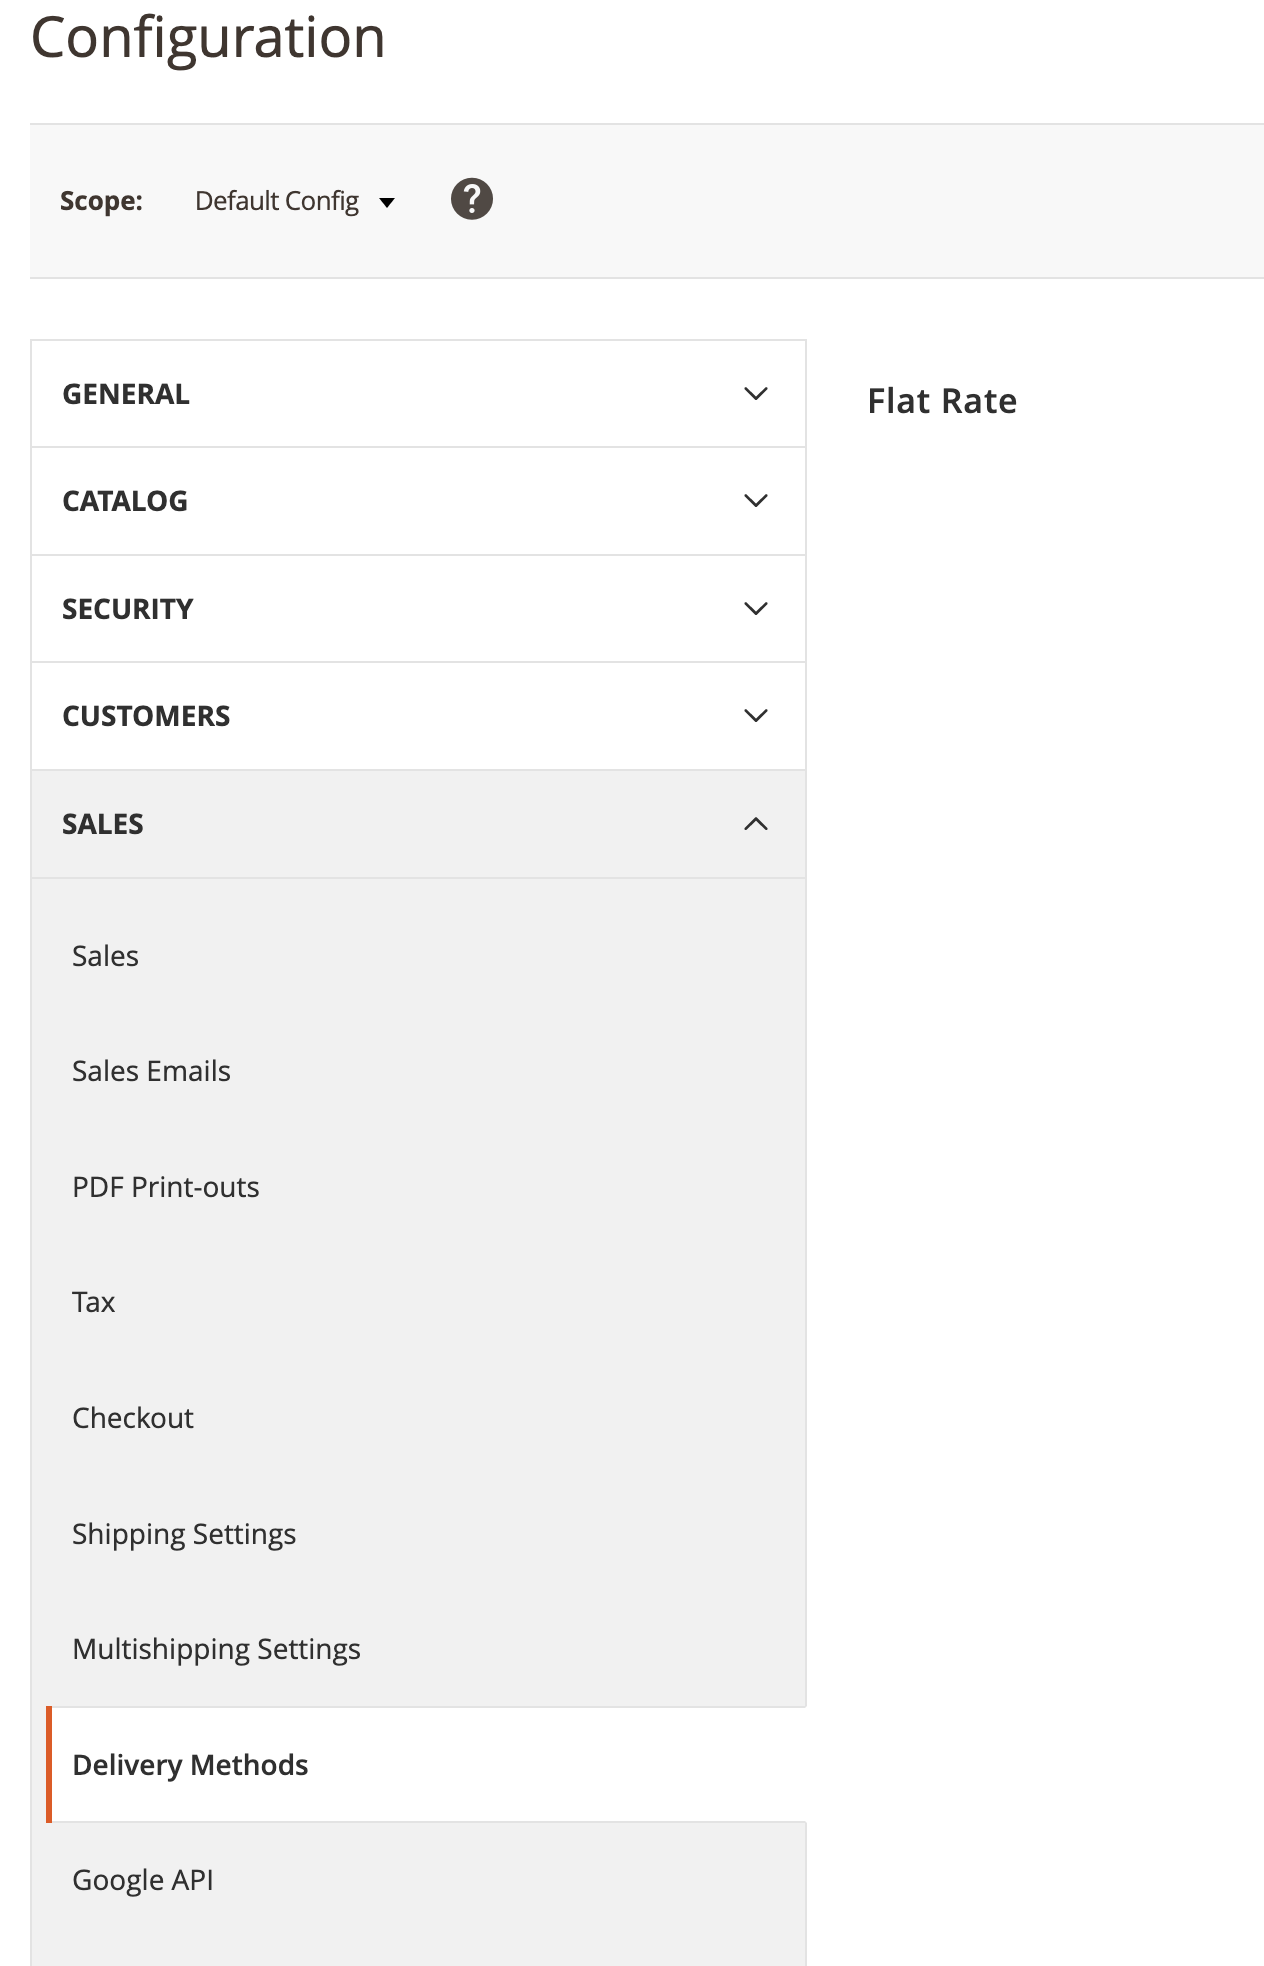
- Set "Enabled" to "Yes. This will enable "Flat Rate" or "Free shipping" shipping.

- You may need to uncheck "Use system value" before you can do this.
- Click "Save Config" at the top.
Step Five: Enable Payment Method
You must have a payment method enabled for Modern Dropship to be able to place orders on your Magento store.
- Navigate to your Magento 2 Admin > Stores > Settings > Configuration > Sales > Payment Methods:
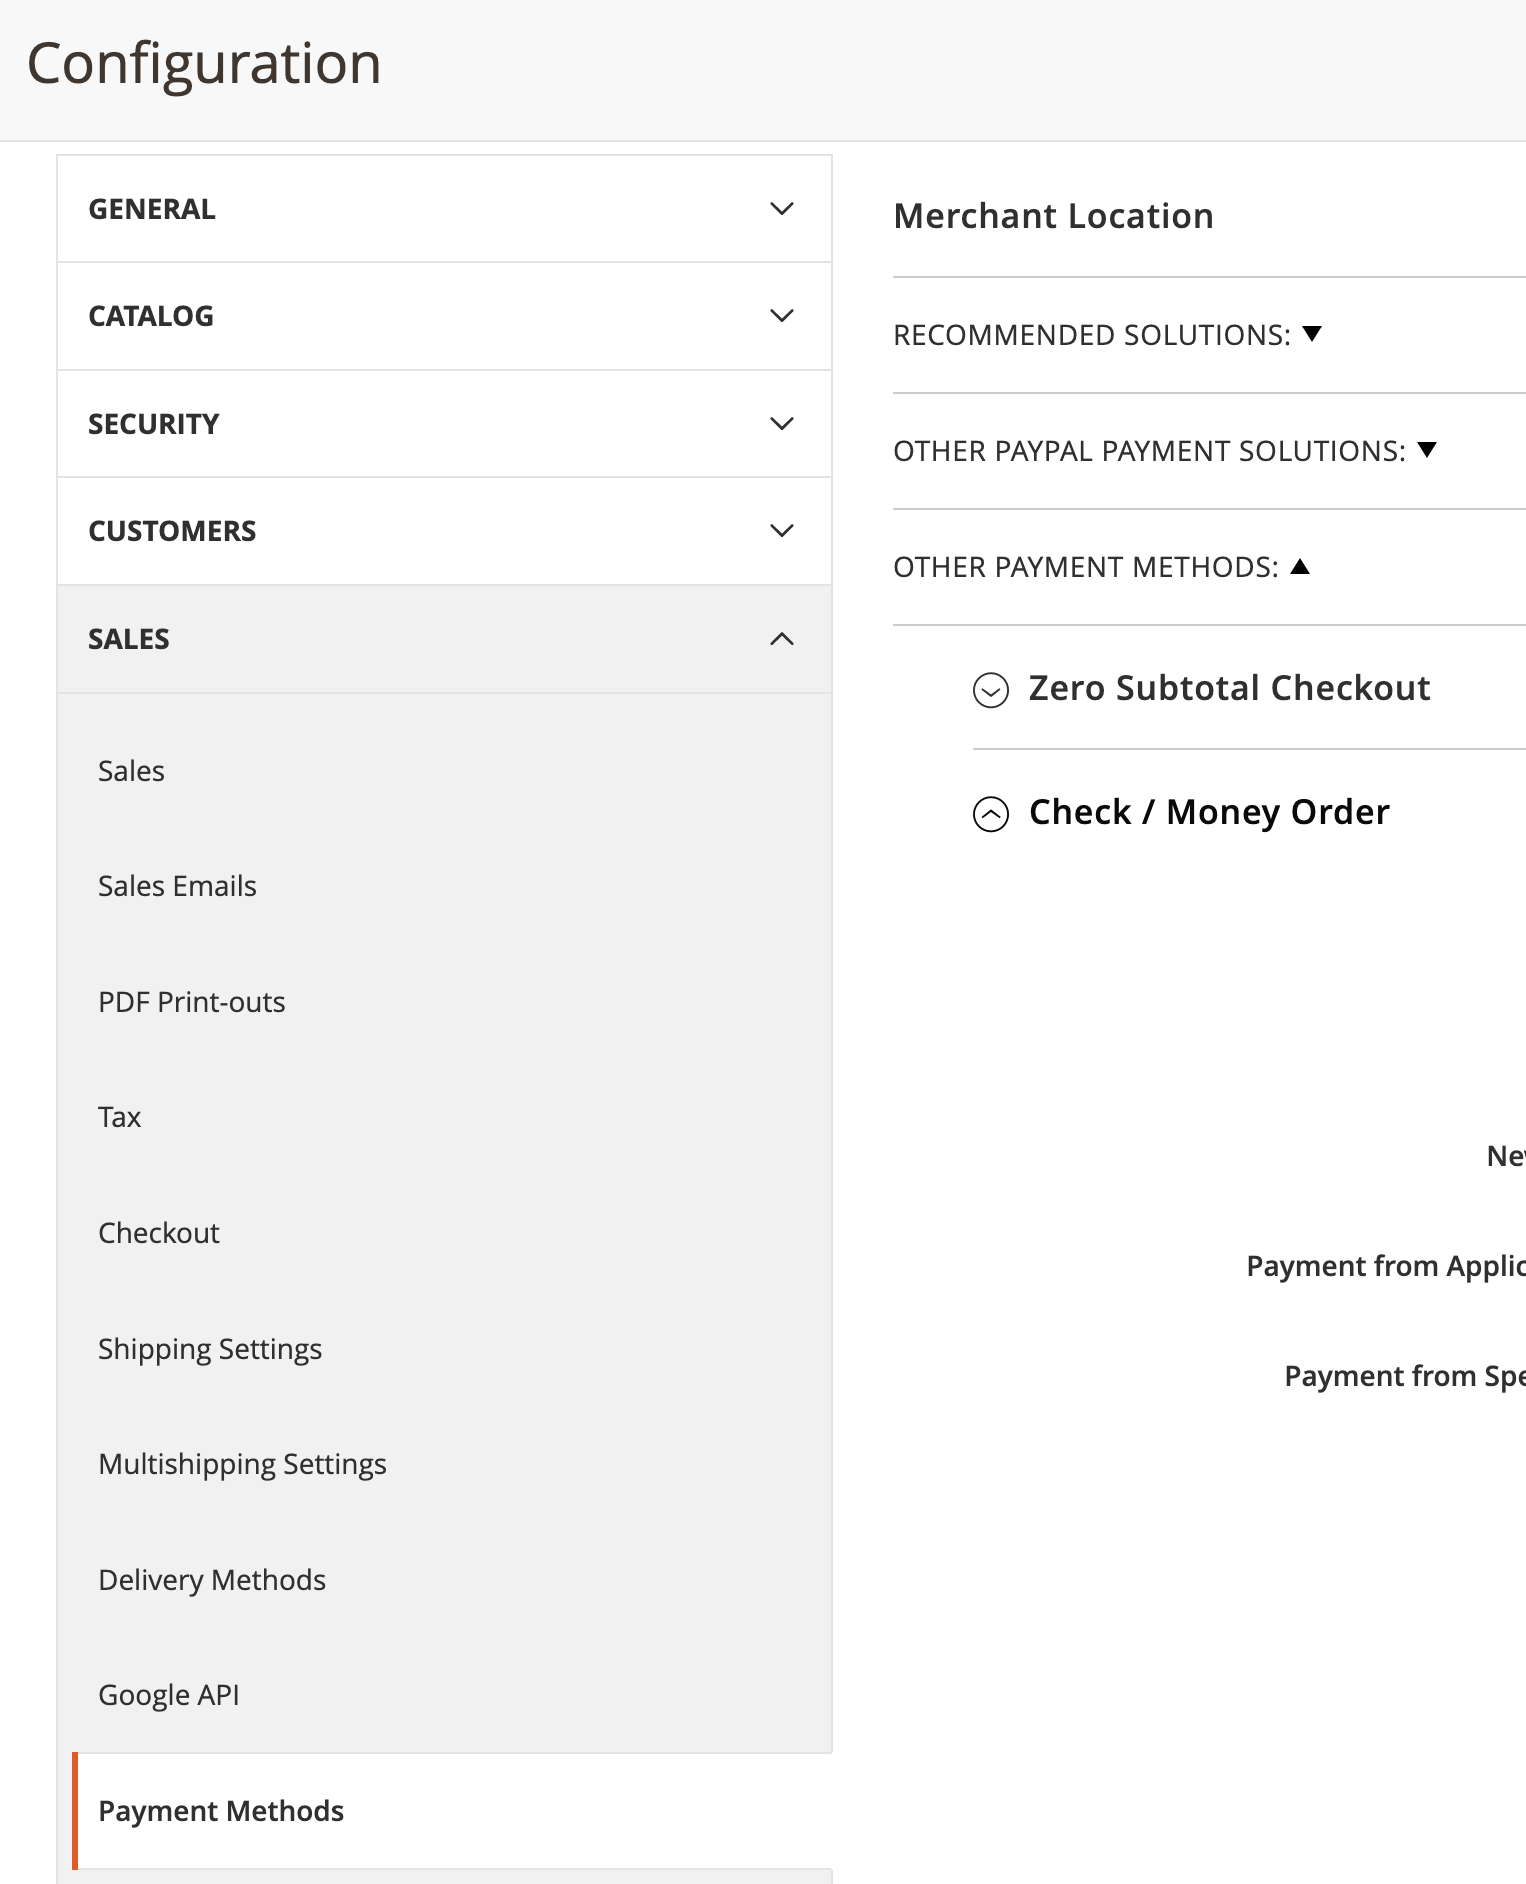
- Navigate to "Other Payment Methods". Then expand "Check / Money Order":

- Set "Enabled" to "Yes". This enables "Check / Money Order," "Cash On Delivery," or "Bank Transfer" settings.
- You may need to uncheck "Use system value" before you can do this.
- Click "Save Config" at the top.
Next Steps
- Now you will need to create your price list in the Prices page.
- Attach your price list to your partners. This will allow your partner to merchandise your products.
- When your buyer receives or directly submits an order for your product, we will pass that order back into your store so that you can fulfill it.
FAQ
Whitelisting Modern Dropship IP Address
You can whitelist our services in your firewall. Modern Dropship requests originate from
34.27.67.179I don't want these shipping methods and payment settings open for my customers. What can I do?
We recommend setting up a new Magento store view for Modern Dropship. This will allow you to set up your Magento store exactly how you'd like for the Modern Dropship integration without affecting your main customer-facing store.
